Send documents to sign with Adobe Sign
Before you can send documents off for signature with Adobe Sign, you need to request an Adobe license from itsupport@dawsoncollege.qc.ca. Once you have a license, follow these instructions to launch Adobe Sign and Send documents for signature. (for testing you may use this document: Sample Document to Sign)
Launching Adobe Sign
There are several ways to launch Adobe Sign: from your desktop Adobe application, from a Web browser, or from an opened document.
1. Adobe Reader or Adobe Acrobat DC
Within Adobe Reader or Acrobat Pro, choose “Request Signatures” from the Sign menu.
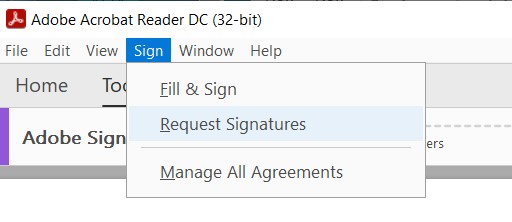
To continue, you need to be logged in to Adobe. The top right corner of your window should like this:  .
.
If you are not logged in, click on Sign in:

On the next window, enter your College email address:
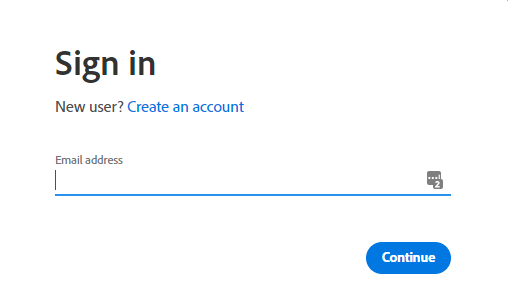
When prompted select Company or School Account.

2. Web browser
You may also launch ADobe Sign from any browser. Go to https://www.adobe.com/ca/ and follow the instructions as above to Sign in.
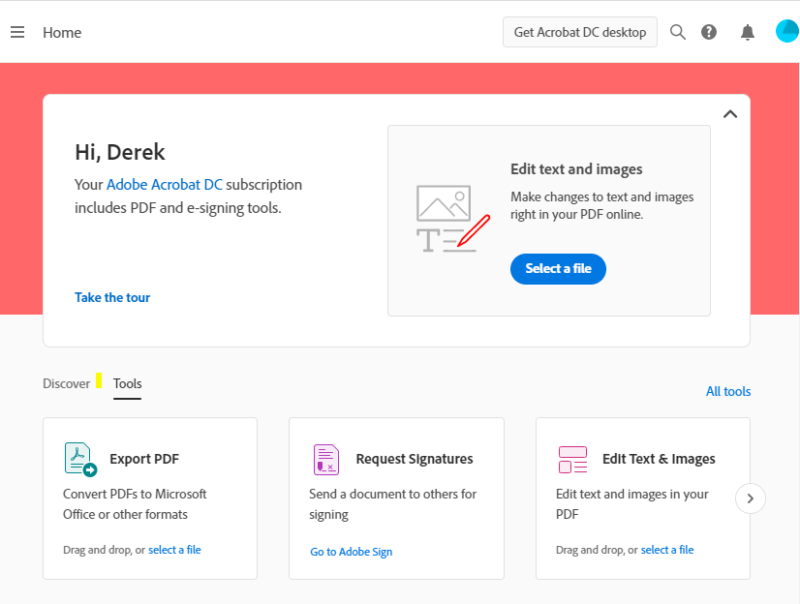
Your home screen should look as below. Click on Document Cloud.

On the next screen cllick on Request Signatures.
3. From an open document
You an also launch Adobe Sign from an open document in Reader or Pro. Make sure you are Signed in and choose Fill & Sign from the Toolbar on the right.
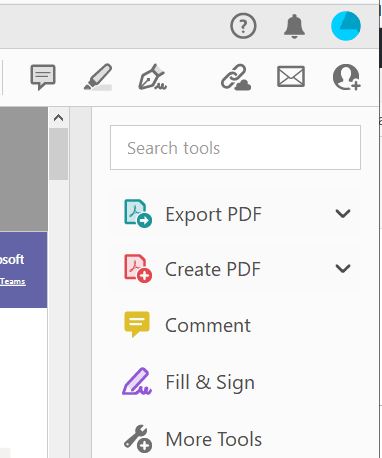
On the next screen, choose Request Signatures.
Using Adobe Sign
There are two steps to send your documents for signature: first specify the signers and the document to sign, and second place the signature fields or boxes on the document.
1. Specifying the signers and the document
Enter the emails of the people signing the document, in order. In the example below, mohara will first be invited to sign the document, and when completed, dgaucher will. When all parties have signed, they will all get emailed a copy of the signed document.
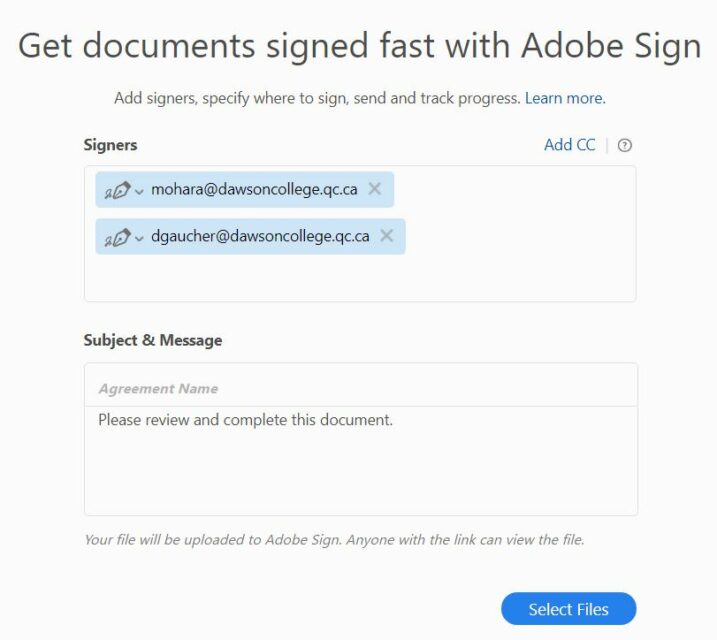
You may also add an email in the CC field, which will not sign, but only get a copy of the signed document.
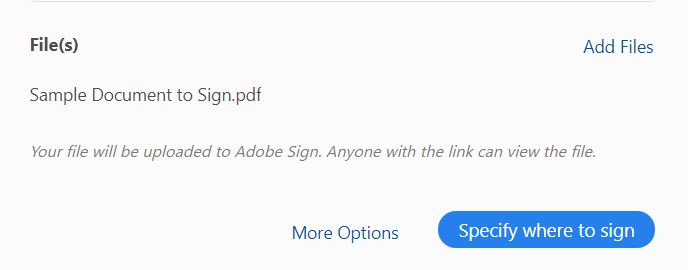
When you’re done with Signers, click on Select Files and choose the document to sign. You may use this document for testing: Sample Document to Sign.
Click on Specify where to sign to move to the next step.
2. Placing the signature fields
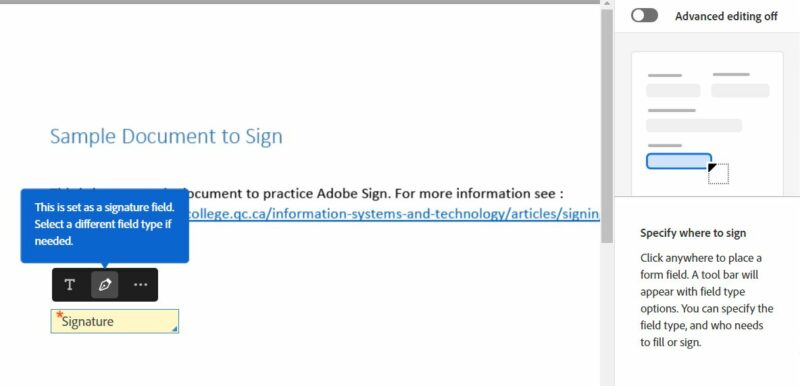
You need to place signature fields (boxes) where you want people to sign on the document. Click anywhere in the document to add a field, and then change the type of the field to a signature by clicking on the pen icon. When finished, the box should display “Signature” as below.
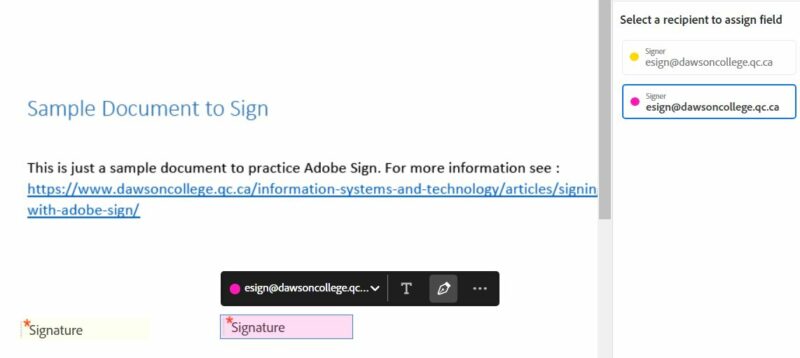
If you have more than one signer, you will need to assign each field to a signer. To do so, select the signer on the right-hand side, and then add the field. Some signers will appear with email address and some with “esign”. You can tell them from their respective order: following our example, the first (yellow) signer is mohara, and the second (pink) signer is dgaucher.
When you’re done, click Send.
More resources
This video will give you a quick overview of Adobe Sign. You may also browse Adobe’s playlist on YouTube.
If you still need help or are encountering issues, please contact IT Support.


